Monday, December 12, 2022

Bathroom Refresh

Our upstairs (main) bathroom has been functional but not very attractive for the years we've lived here so we decided to update it. Since we only have the one tub/shower we didn't modify that area this time around. But everything else was updated or replaced except for the toilet which I had already replaced several years ago.

I began this project with removal of our personal effects from the vanity and wire shelving we had installed on the wall to the right of the sink. Then the mirror, vanity, and toilet were removed. The vanity and top were donated to ReStore and the toilet was saved for reinstallation later.


Begging demo work. Mirror already removed.
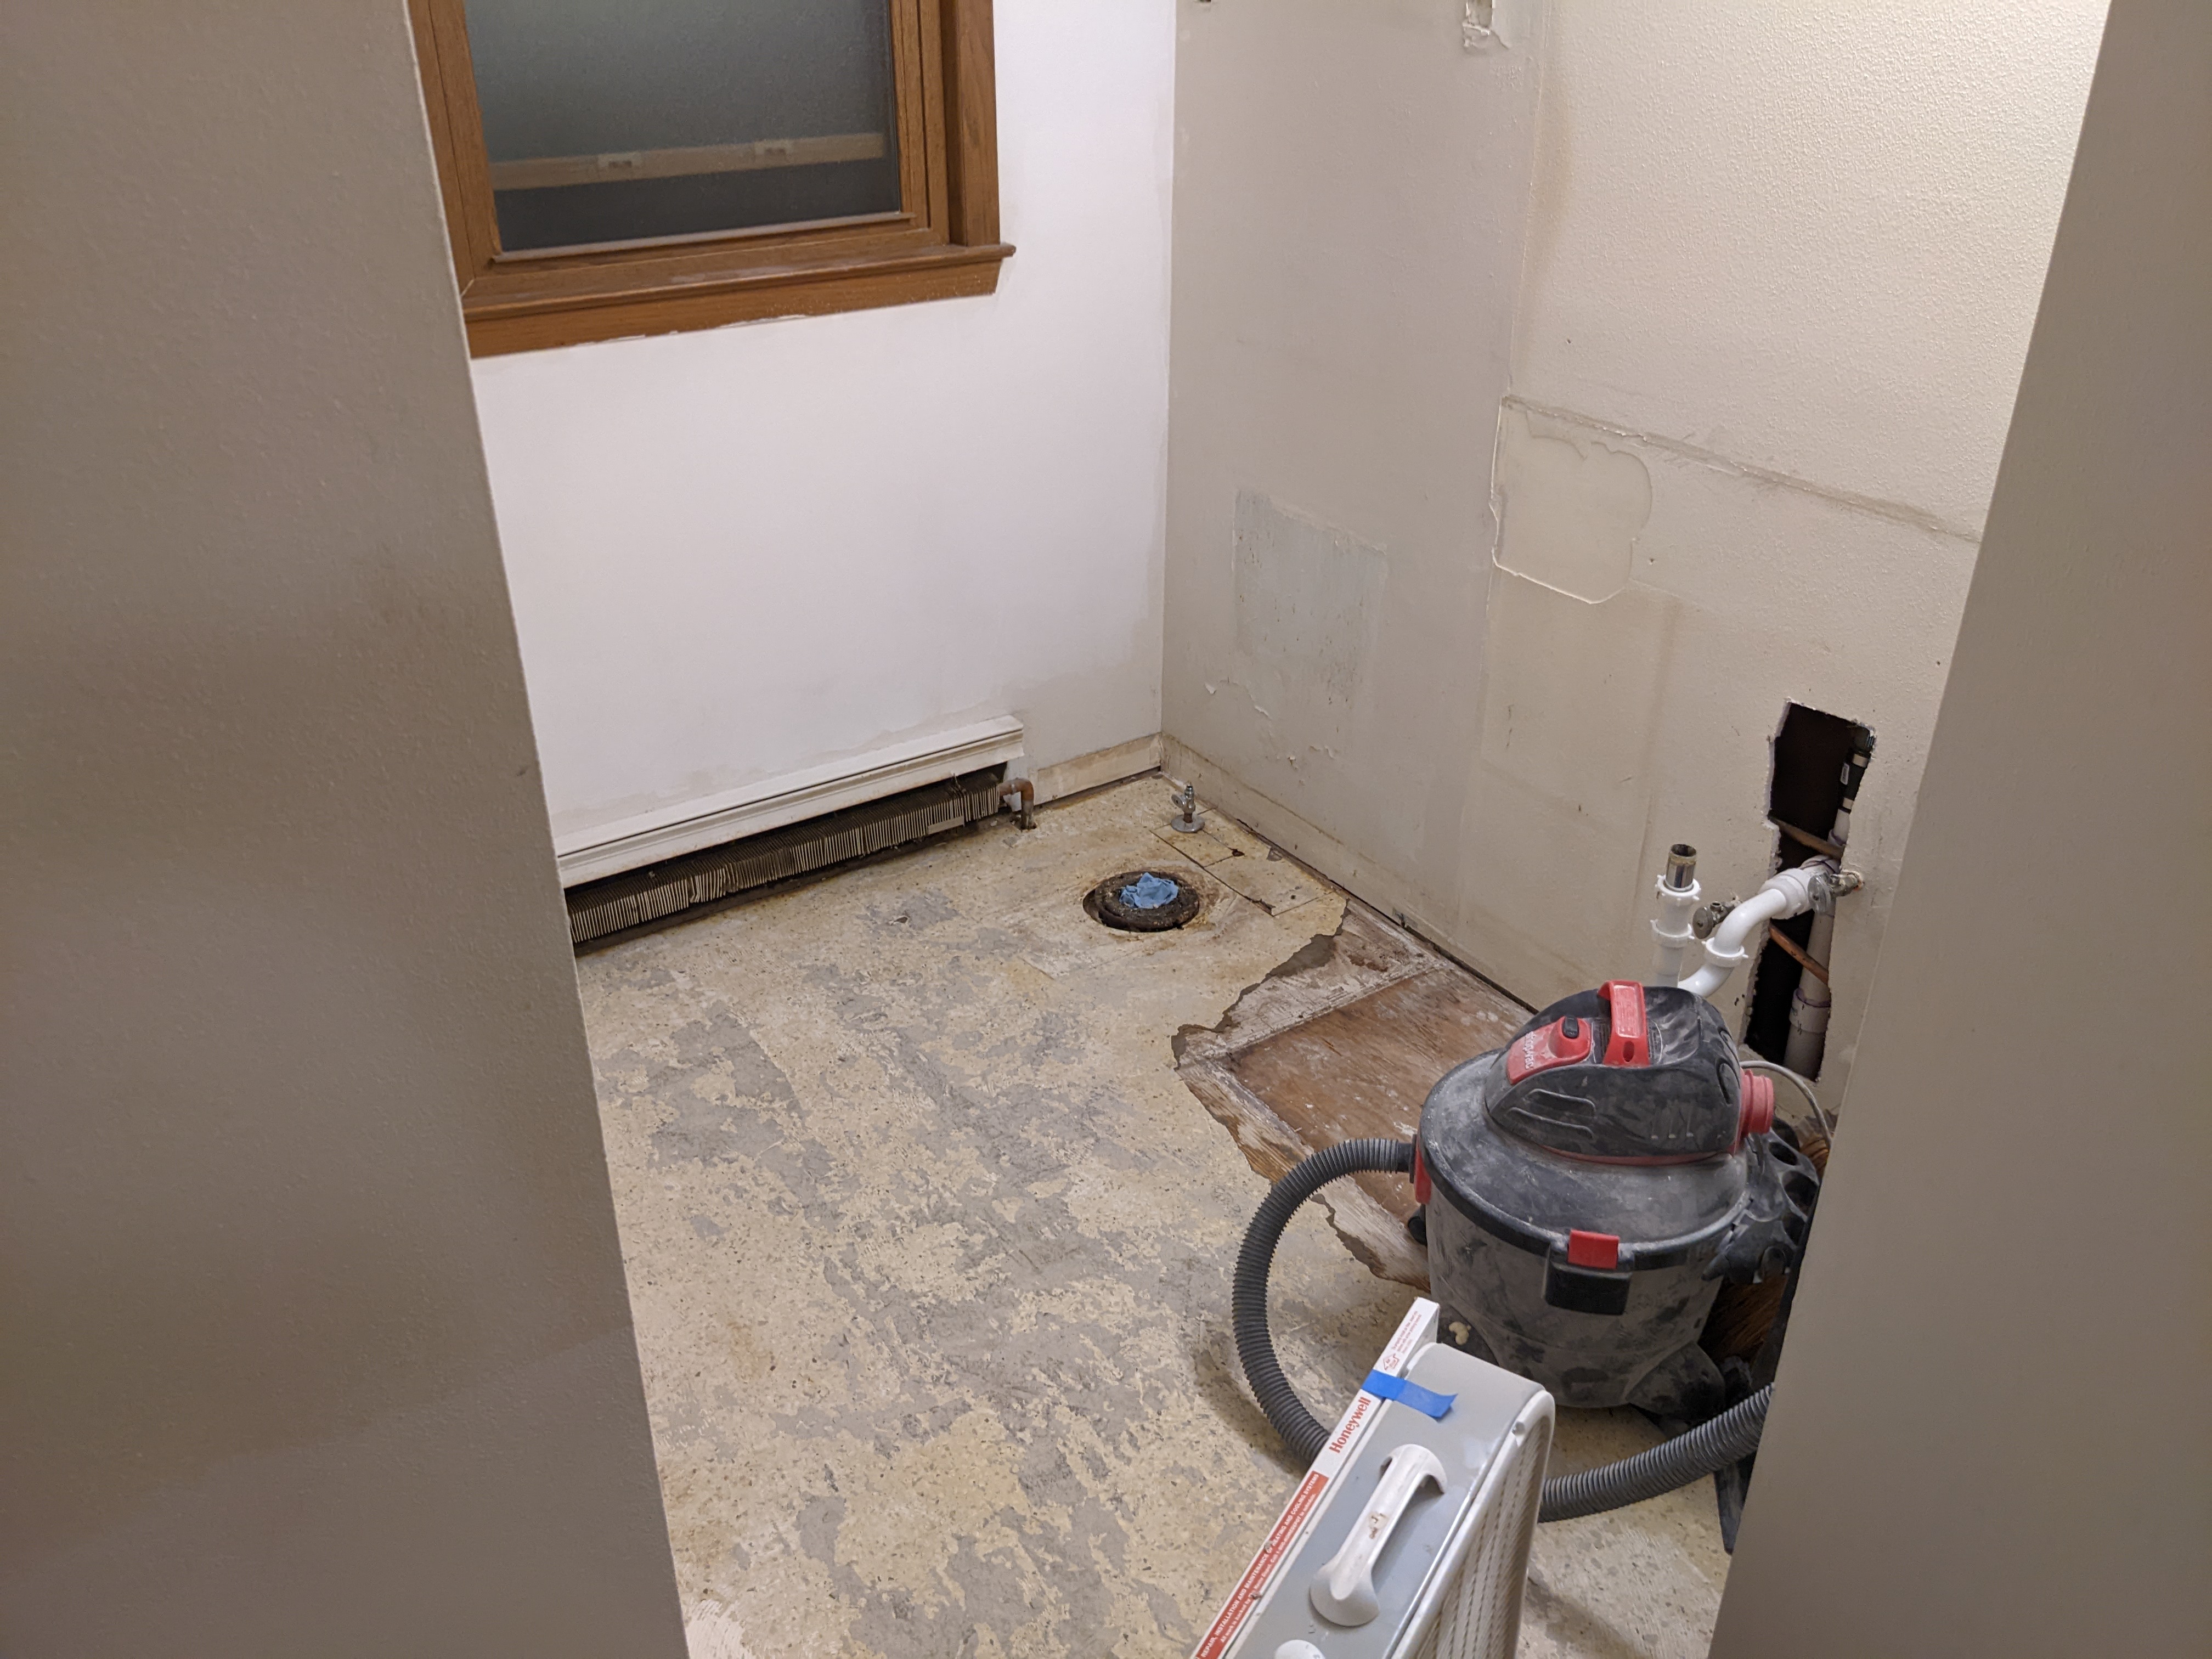
Fixtures removed.

Once the fixtures were removed I focused on the floor(s).  The first layer, which Vincent calls the "ugly yellow floor" pulled up pretty easily, but beneath it was 1/4" plywood underlayment that was fastened down with 2" staples. I pulled all of these by hand with a small crowbar, some pliers, and a screwdriver. Under the wood was the next layer of blue flooring. This peeled up pretty easily and was just glued down on top of what I suspect is the original floor. Given the previous flooring materials I encountered in the basement I am 90% certain this last layer contains asbestos. I decided not to remove it and just filled in the low spots and holes with a self leveling compound in preparation for the new floor.

Yellow floor and plywood removed.

Probably the original (asbestos?) floor.

Cleaned and ready for prep work.

Filling in some holes.

Fill in the low spot where the vanity was.

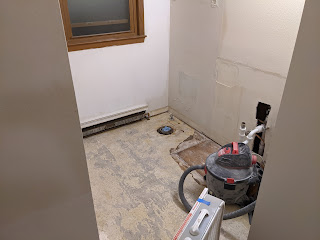
With the floor prepped and before I installed the new one I did some work on the wall behind the vanity. I added an outlet where the mirror will be installed to have power for a future fogless/lighted mirror. I also added an outlet near the toilet for a bidet. These are protected by the GFCI outlet on the right wall (out of picture).

New outlets.

Next was the flooring. We chose a LVP product for the waterproofness, durability, ease of installation, and color options.  The Banff Gray Hickory flooring from Home Depot is what we selected and it went in pretty quickly. I did have to make a lot of cuts around the curved tub apron but overall installation was simple and the results are great. Most of the straight cuts can be done with a utility knife and the plank is snapped. Other cuts required a fine tooth jigsaw blade to follow curves or for shorter cuts and notches. Since it is a floating floor, nothing had to be fastened down and the 1/4" expansion gap around the perimeter gets covered by the base and shoe molding.

Starting floor installation.

Flooring installed.

After the flooring was installed I covered it in rosin paper to protect it while I worked on the rest of the room. A few areas required drywall patching and retexturing before paint. I also installed the shiplap wall behind the vanity. After everything was taped off I used my HVLP sprayer to paint the entire room. I did not want to have to brush all of the shiplap joints and then roll it out. This was followed by the trim which was all brush painted as well as the baseboard heater covers (wirebrushed, primed, then painted).

Floor protection in.

Shiplap installed.

Painting.

After paint I was able to install the light fixture so I could stop having to step around my portable lamp. This made a huge difference in the room and also made it easier to move around and get work done without the large stand of the worklight.

Most painting complete. Light installed.

Then I could start installing the rest of the fixtures, beginning with the toilet. I reused our existing toilet, but because the closet flange was originally installed incorrectly (90° from the correct orientation) I took this opportunity to install a repair kit that will put the flange bolts where I need them and not let the spin when installing the nuts as they previously did.
Toilet installed on repaired flange.

The vanity was next and I also took this time to install new 1/2" shutoffs to go along with the bypass valve used in the recirculation function of our recently installed tankless water heater. After some caulking and testing, the water was turned on and we could use the sink.

Vanity installed. 

We selected a mirror from IKEA during our last visit there. Maybe in the future we will get something with a lighted frame or a fogless model since we have the outlet for it.

Mirror completes the vanity area.

With the interior of the bathroom done I then installed the new craftsman style 3 panel door and trim. This door matches the new ones installed for the nursery 3 years ago. The last steps are to paint this trim and caulk the seams and that will wrap it up. The only other thing we may add is an above toilet cabinet for some additional storage but that can come later.

Friday, October 28, 2022

Going Tankless

We recently had a blower door test performed as part of an insulation upgrade and the found that the water heater was not venting properly. Given that the unit was over 15 years old it wasn't worth correcting the issue both because of its age and because of the amount of corrosion visible on the outside. I didn't think if we opened any valves for draining we would be able to close them again and I certain wasn't going to be able to even remove the anode rod for replacement. We opted to get a super high efficiency tankless unit to both reduce energy costs and to free up some floor space in the basement.

The first step to installation was to mount a strong backing on the basement wall. I fixed a 3/4" plywood board to the block wall near the washer and dryer since that would be the most direct route for the venting requirements. It is also near the utility sink which is necessary for the condensation drain.


Plywood backer.

New water heater is heavy.

The water heater comes with a bracket that gets mounted to the wall or in my case the plywood. This hanging holds it in place nicely while you fasten it permanently with some screws both at the top and the bottom. I mounted it slightly to the right of the backer so I had room to add a larger outlet box to supply the washer, dryer, and now the water heater. Conduit bending is an art I haven't mastered but I managed well enough to do the box offset and go around the hydronic piping you can see at the ceiling.
Mounted.

Upgraded outlet.

With the outlet updated I moved on to the venting. One of the nice features of most tankless heaters, including this one, is that you can use typical PVC piping for both the exhaust and intake venting. With a simple cover for the outside of the house, this was very straightforward to do. I also installed the condensate line using some PEX I had leftover from a previous project, but a plumber informed me I should replace this at some point with regular PVC since the condensate can be acidic and corrode the PEX fittings pretty quickly. Sounds like a Future Nate problem.

Next was getting the water lines connected up. Since the lines supplying the utility sink are 3/4" copper I figured I could just attach on to those. I removed some elbows and replaced them with T fittings and ran new lines to the water heater. The heater came with shutoff valves and the hot supply side included a pressure relief valve as well. I soldered all the piping and fittings into place and water tested them successfully. The last step was to get gas connected.

Condensate line and water lines.

Since I didn't want to deal with cutting and threading a bunch of new black pipe I hired a plumber to come and install the gas supply line. They used a CSST pipe that fed off the old water heater supply and looped around to the new water heater. Once that was connected I was able to turn on the water heater, configure it, and start using it.

Gas line installed.

After the new heater was up and running, I worked on removing the old tank model. I cut and capped the water lines and then removed the venting. The plumbers disconnected the gas line when they installed the new one so everything was disconnected at this point. I tried to drain the tank but the spigot at the bottom of the tank was so clogged with mineral buildup that no water was making its way out. After removing the entire spigot and clearing the hole with a screwdriver all 50 gallons started to spray out over the basement floor. Thankfully I was able to tip the tank toward the floor drain and contain most of the water, but a lot still sprayed out and covered the floor with the mineral buildup that had been sitting at the bottom of the tank for who knows how long. Even the hot supply fitting was nearly closed up due to the corrosion and minerals.

Old hot supply corrosion.

Mineral deposits from the tank.

The old tank heater was dropped off at the Brookfield recycling center and a lot of the copper and brass plumbing components were saved for future smelting in our foundry.

Wednesday, March 2, 2022

Network Rack

We recently upgraded out internet service to gigabit fiber from AT&T. The price is $5 more than we were paying for 300/100mpbs from Spectrum so it was really an easy choice. I have to say, the service setup and installation was super easy and the technicians were friendly and answered all my questions. Overall I had a great experience switching ISPs. But that did move up my network upgrade project much sooner than I had planned. I need to make a server rack and update my equipment.

Server rack mounted, ready for equipment.
On my woodworking blog you can see how I built the actual server rack enclosure and mounted it to the wall. I cut out some holes in the top to accommodate a 140mm fan for ventilation and a grommet for wires to pass through. A colleague at my previous job gave me a patch panel and that was the first thing to install. I rerouted and ran some new CAT5e cables from the media center and the office to the panel and then hooked them up to my new POE switch.
Blank panel to reserve room for the fan in the back top.
I opted for a POE switch in order to make installation of access points easier. I have a Ubiquiti AP Lite for upstairs that I still need to permanently install as it is just running on my office desk for now. The POE makes it convenient to only require a single network cable for installation. More APs will come later, most likely in the sunroom for outdoor coverage and possibly in the media center for stronger coverage in the main living space of the house.

Server in new IPC case installed.
I moved my home server components into a new IPC case and installed it in the rack. This clears a lot of room on the home brew shelving where the server used to live. The new enclosure is also much quieter and provides significantly more room for disk storage expansion as my Plex library grows. A rackmount surge protector was also installed to clean up the wiring and keep everything consolidated within the rack.


Wednesday, June 21, 2017

Smarty Pants


One of the oddities I found when we moved in was that there were two thermostats in the house. One controlled the air conditioner (that was installed sometime in the early 2000s) and the other controlled the boiler for heat. I wanted to upgrade to a smart thermostat and the Ecobee 3 was on sale on Amazon at the time so I purchased it.


A/C thermostat in the stairwell.

Heat thermostat in the living room near the dining area.
Label the wires before removal.
I had to re-route the two conductor wire for the boiler to the same location as the A/C thermostat which proved to be more difficult than I anticipated. The split level design of the house meant I had to guess where the base of the wall framing was in the stairwell. It could be at the base of the stairs or on the same level as the upstairs floor which would put it midway in the wall. It ended up being the latter of those two scenarios and I had difficulty using my flex bit to drill a hole in the wall plate to run the wire. The bit didn't track in the plate properly and punched a hole on the other side of the wall. This was okay since it gave me an idea of how thick the wall plate was. I found it wasn't just a wall plate but the joists were there as well. That meant I would have had to drill through about 12" of material. Since I already had a hole I needed to patch I opted to cut a notch into the drywall to put the wire in and I would patch it up later. Once it was around the joists I fed it back into the wall and had a clear shot to the basement. Since it is a low voltage wire I'm not too concerned about it being in the drywall and it is in a position that will never get anything hung on the wall so no fear of nails or such puncturing it.

Notched wall.
Cable in a fastened down.
In the basement I had to cut a small hole in a wall in the closet to fish the wire down through. I also drilled a small hole through two joists to feed the wire through before turning toward the boiler. I used cable staples to keep the wire in the joist bay as I ran it to the boiler. I wired it up the same way the old wires were attached and I was all set.
Used the hole to pull wire down, then snaked it through the joists.
Once all the wires were at the thermostat I could actually install the new Ecobee. This part was super simple and the instructions were very clear on how to wire the separate systems. With the app installed on my phone I set up the configuration and installation was complete.

Ecobee 3 installed.
The Ecobee also came with one room sensor that I placed in the bedroom. This is supposed to help regulate temperatures in the most used rooms. When it is too warm there but the living area is cool the Ecobee will just run the fan to try to circulate the cold air to the bedroom. Ideally we would have a zoned cooling system but right now that isn't feasible. The last step in this project was to patch the drywall and try to match the texture. I'll be painting that stairwell and hallway at a later date.

Friday, June 16, 2017

Stair Painting

When we decided to get our wood floors put in we knew we were also upgrading our molding. In order for everything to match I would have to paint the stair risers and runners after the treads were refinished. These ended up taking quite a bit more time than I had initially thought they would.

Starting out.

Had to set a couple of nails.

Prep work makes for a great paint job.
After taping up everything I sanded the risers and runners a bit so the paint would adhere better. I only had to take off a bit of the current finish and smooth any roughness left from the carpet staple removal I did back when we moved in. After wiping everything down with a tack cloth I put on one coat of oil based primer. Next was the paint.

Some paint.

All finished up.
I ended up applying three coats of paint on top of the primer to get full coverage of the original dark wood stain. This took me longer than I expected because there are so many nooks and crannies to get when painting stairs. I also caulked along the runners and walls to fill in a few gaps that were visible, probably from the house settling over the years. They weren't huge but the stairs look much better with them filled. I followed my normal procedure of running a thin bead along the joint and smoothing it over with a damp finger. Any little errors can be cleaned up with mineral spirits.

Wednesday, May 24, 2017

Under Pressure

Surprise projects are always the best projects and we had a bit of a surprise on Friday: two leaks on the well pressure tank. I knew we had pinhole leaks on the old galvanized tank but there were just damp and never had dripped or anything so I figured we could hold off on a new tank for a while. I was wrong. Friday we found the holes dripping quite a bit and decided to try and patch it for the time being. I started by turning off the well pump, closing the main valves for the house, and draining the tank.


Both leaks in the front.

Draining the tank with the ShopVac hose.
As the water level lowered, I started to clean up the holes for the patching I would do. There was a lot of mineral buildup on the outside of the tank so I scrubbed it with a wire brush to give me a clean surface to work with. This was a bad idea at the time because as soon as the mineral buildup flaked off the leak got worse and water was streaming out. Oh well, the floor drain will catch it all.

Cleaned up and drained.
I had several plans for patching and the first was to use a Neoprene washer on a self tapping screw that I would drive into the holes. Both holes crumbled when I attempted to do this and the openings just got bigger. So I had to try my backup plan.

Larger holes after attempting first fix.
Plan B was to use JB Weld to close the leaks temporarily until we could get a plumber in during the week to estimate a new tank for us (I'm not paying weekend rates!). I cleaned and dried the area for the patch and mixed up the epoxy. I applied it with an old paint stirring stick and waited for it to cure. Initial curing is supposed to take 5-6 hours so most of my day on Saturday was waiting for this step. After curing, I wrapped the area in duct tape to help hold the pressure and opened all the valves. I turned on the pump and watched as the pressure built. 10 PSI, okay. 20 PSI, okay, 30 PSI some dribbles, crap. 40 PSI a lot of steaming water. JB Weld didn't hold as well as I expected and I didn't have the 16 hours to let it cure fully. I used this time to run some water in the house that we needed to and then turned the pump back off and re-drained the tank. It was late in the day so I waited until Sunday to do the rest of the project: replacing the tank.

You've failed me for the last time, JB Weld.
Sunday I started early at 6:30am and began by removing the old tank. This meant turning off the breaker for the pump and removing the electrical connection to the pressure switch, disconnecting the pump supply line, and disconnecting the post-tank line that feeds the house. The pump line had a union joint in it that I could just undo and the house line was PEX so I simply cut that.

Removed the tank.
I was going to try to reuse much of the old fittings and valves to save cost but much of it was so corroded or unmoveable I didn't bother. The new tank is setup slightly different too, the outlet is not on the side of the tank as you can see on the old tank but rather it is on the bottom and centrally located so I needed a longer tee valve.

Old tank.
I also took this opportunity to install a new whole house filter. I attached a piece of 3/4" plywood to the wall behind the tank area which gave me a good mounting point for the new filter. I bought the Whirlpool house filter and installed shutoff valves on either side to make it easier to replace the filter. Using PEX tubing, I attached the outlet side to the main house line

New filter with shutoffs.

Outlet connected to house.
I also used PEX to run a line to where the new tank outlet would be and started assembling the tank fixtures. I bought a large tank to help reduce the amount of work the pump has to do and extend its life. With much thread tape, I attached the new 13" tee fitting and to that attached the old pressure gauge and pressure switch that controls the pump. A new drain spigot and pressure relief valve completed that assembly.

New tee. Note the different attachment point under the tank.

Gauge, drain, and relief installed. Switch attaches to the 1/4" pipe above the relief valve.
I moved the tank into position and fitted a new copper elbow to the pump side of the tee. To this I soldered on some 1" pipe and a threaded adapter. This is where a check valve goes so the pressure tank doesn't push water back into the well. I cut the old pipe just above the union joint and installed a new union. I measured the length between the new union and the check valve and cut a length of pipe to fit between them. This pipe got a threaded adapter on the check valve side and the other end of the union joint on the top. The union makes it so you can thread the check valve on after soldering your joints since you don't want to heat it and ruin the rubber gasket inside. With these all assembled I could connect the inlet from the pump to the tank.

New union and check valve.
Next was connecting the outlet from the tank to the new house filter I just installed. This was all done with PEX and was pretty straightforward. I made most of my connections before installing since there was limited room to use the crimping tool on the fittings behind the new tank. The last thing to do was to reinstall the pressure switch and connect the electrical. Unfortunately the new tank tee sits lower than the old one so the rigid conduit couldn't reach. I had to go buy new flexible conduit and run 12 gauge wires through it to support the 230v system. With the electrical run and some trial and error figuring out how the pressure switch gets wired the pump turned on and started filling the tank.

New tank and house filter.
Success! The union needed a bit of tightening but the system works and we have water in the house again. The house filter already picked out quite a bit of sediment so I'll have to keep an eye on it for replacing. Since the electrical moved I still have to reattach the pump switch to the wall but I need to drill into a solid concrete foundation block to do that. All in all it was a busy but productive Sunday.