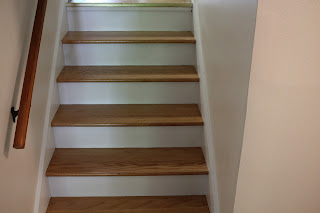
One of the oddities I found when we moved in was that there were two thermostats in the house. One controlled the air conditioner (that was installed sometime in the early 2000s) and the other controlled the boiler for heat. I wanted to upgrade to a smart thermostat and the
Ecobee 3 was on sale on Amazon at the time so I purchased it.
 |
| A/C thermostat in the stairwell. |
 |
| Heat thermostat in the living room near the dining area. |
 |
| Label the wires before removal. |
I had to re-route the two conductor wire for the boiler to the same location as the A/C thermostat which proved to be more difficult than I anticipated. The split level design of the house meant I had to guess where the base of the wall framing was in the stairwell. It could be at the base of the stairs or on the same level as the upstairs floor which would put it midway in the wall. It ended up being the latter of those two scenarios and I had difficulty using my flex bit to drill a hole in the wall plate to run the wire. The bit didn't track in the plate properly and punched a hole on the other side of the wall. This was okay since it gave me an idea of how thick the wall plate was. I found it wasn't just a wall plate but the joists were there as well. That meant I would have had to drill through about 12" of material. Since I already had a hole I needed to patch I opted to cut a notch into the drywall to put the wire in and I would patch it up later. Once it was around the joists I fed it back into the wall and had a clear shot to the basement. Since it is a low voltage wire I'm not too concerned about it being in the drywall and it is in a position that will never get anything hung on the wall so no fear of nails or such puncturing it.
 |
| Notched wall. |
 |
| Cable in a fastened down. |
In the basement I had to cut a small hole in a wall in the closet to fish the wire down through. I also drilled a small hole through two joists to feed the wire through before turning toward the boiler. I used cable staples to keep the wire in the joist bay as I ran it to the boiler. I wired it up the same way the old wires were attached and I was all set.
 |
| Used the hole to pull wire down, then snaked it through the joists. |
Once all the wires were at the thermostat I could actually install the new Ecobee. This part was super simple and the instructions were very clear on how to wire the separate systems. With the app installed on my phone I set up the configuration and installation was complete.
 |
| Ecobee 3 installed. |
The Ecobee also came with one room sensor that I placed in the bedroom. This is supposed to help regulate temperatures in the most used rooms. When it is too warm there but the living area is cool the Ecobee will just run the fan to try to circulate the cold air to the bedroom. Ideally we would have a zoned cooling system but right now that isn't feasible. The last step in this project was to patch the drywall and try to match the texture. I'll be painting that stairwell and hallway at a later date.


